Allow the microphone
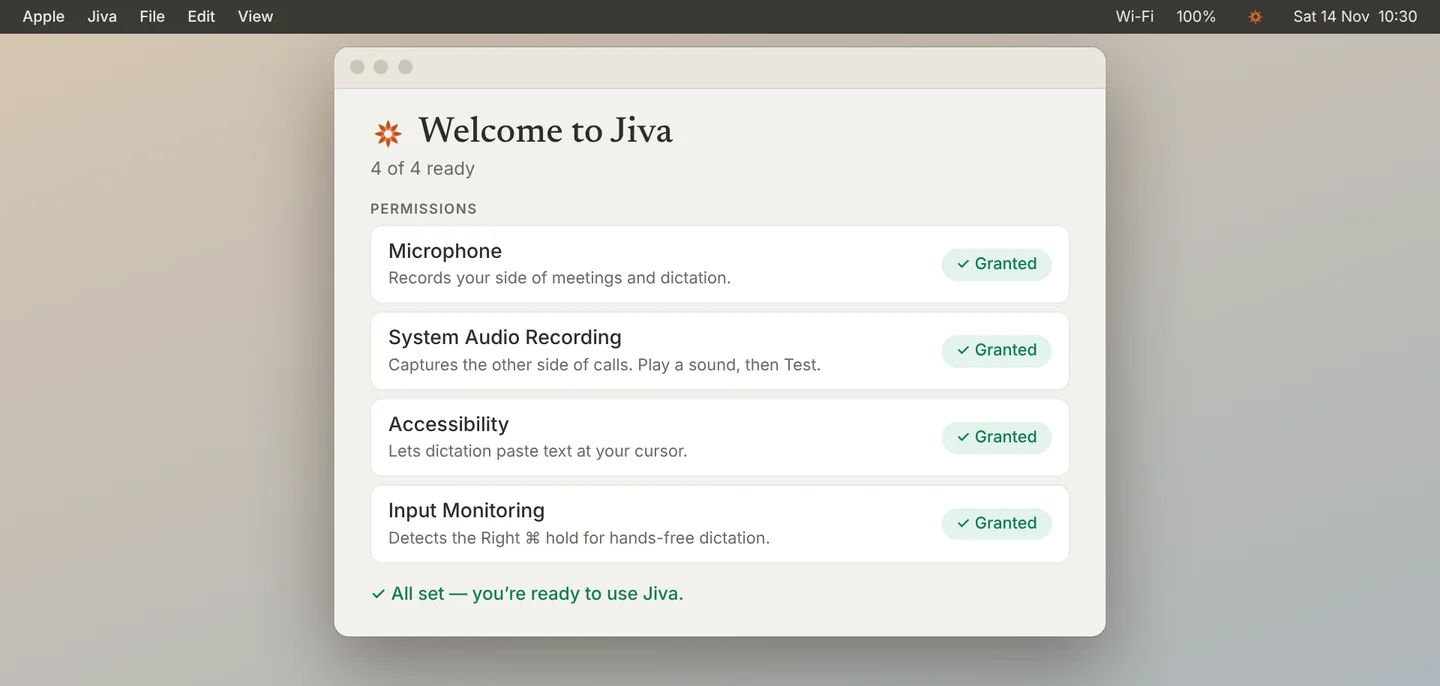
In the Welcome to Jiva window, click Grant next to Microphone. When macOS asks, click Allow.
Jiva uses the microphone to record your side of a meeting and your dictation.
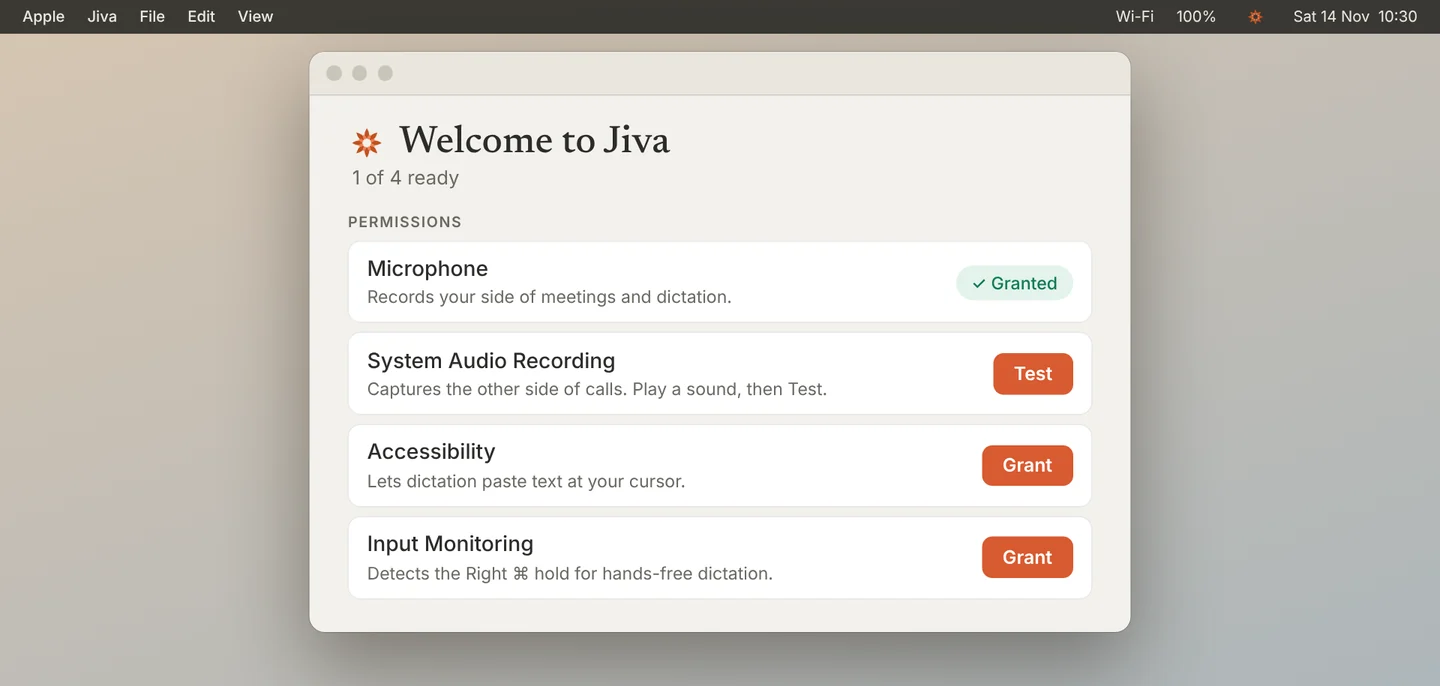
Allow system audio
Play any sound on your Mac, such as a video. Click Test next to System Audio Recording, then Start 8-second test. If macOS asks, click Allow.
Jiva uses system audio to hear the other people on a call.
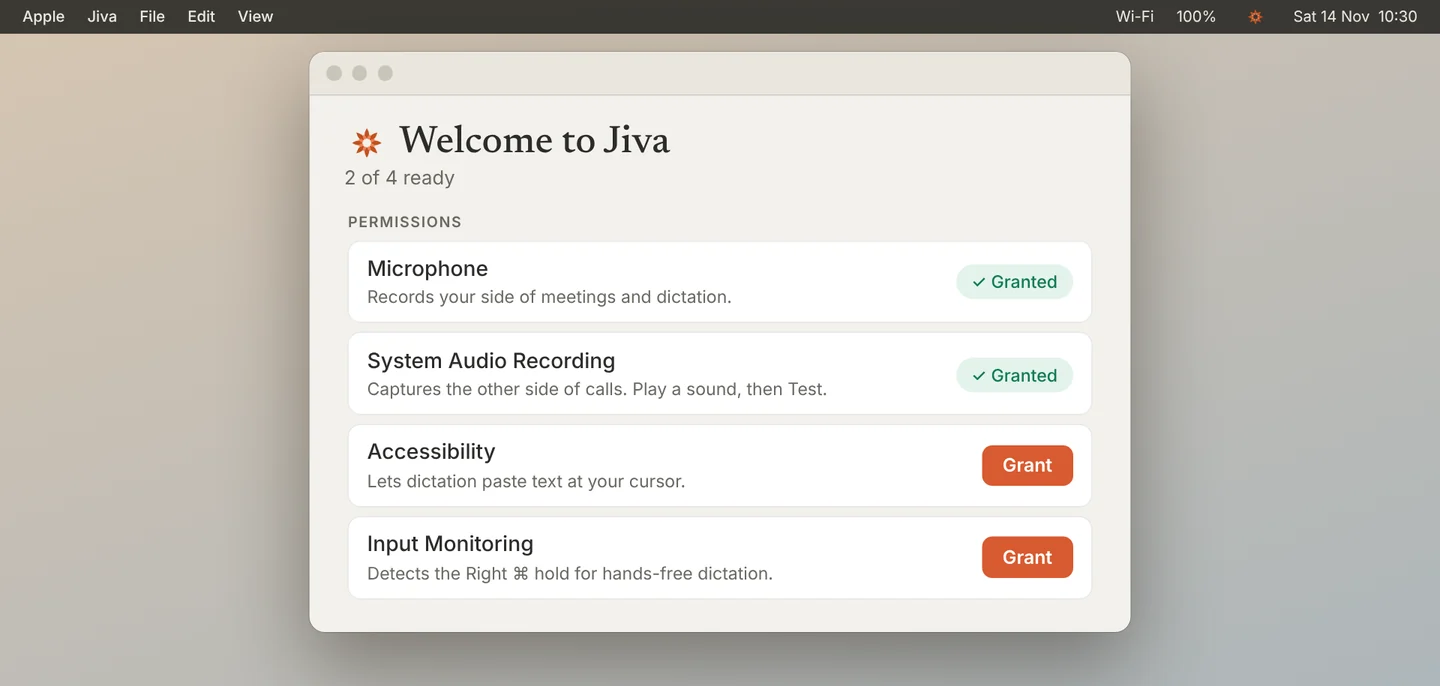
Allow Accessibility
Click Grant next to Accessibility. System Settings opens. Switch Jiva on. macOS may ask for your password or Touch ID.
Jiva uses Accessibility to type your dictation where your cursor is.
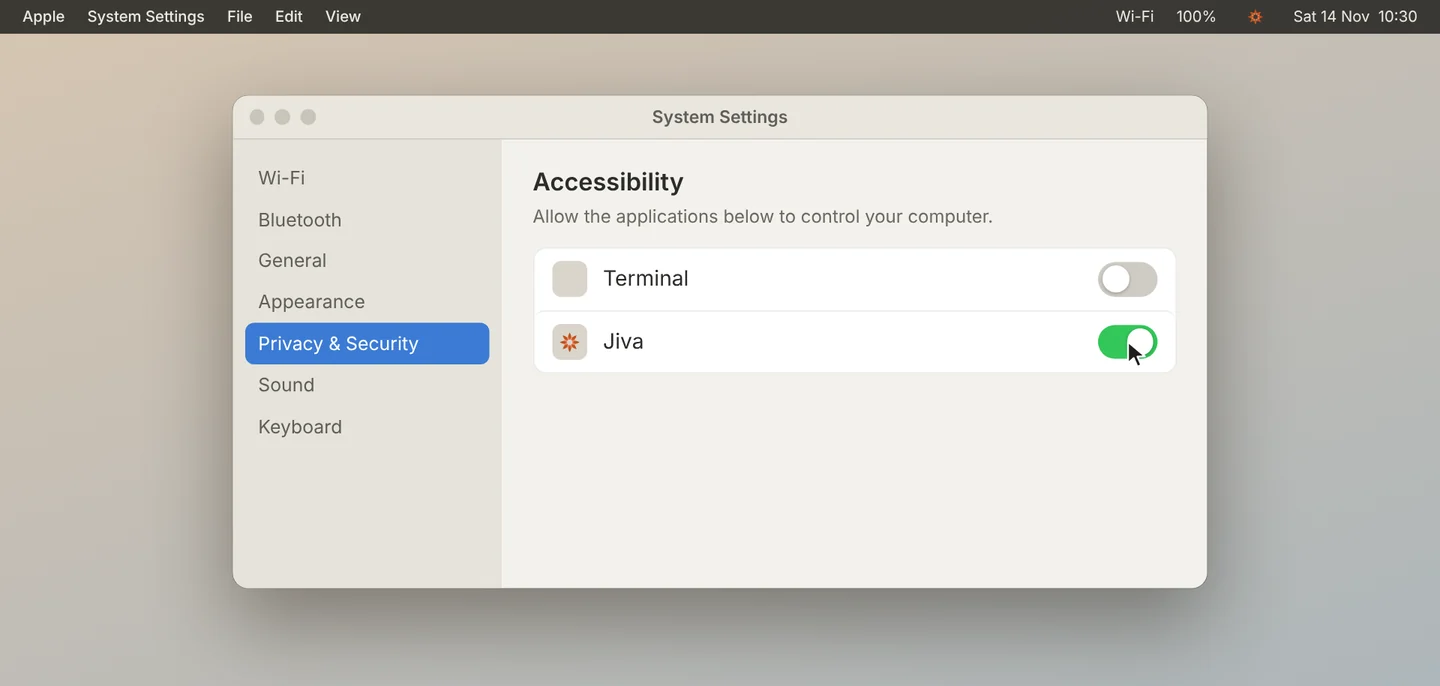
Allow Input Monitoring
Click Grant next to Input Monitoring, then switch Jiva on in System Settings.
Jiva uses Input Monitoring to notice when you hold the dictation key.
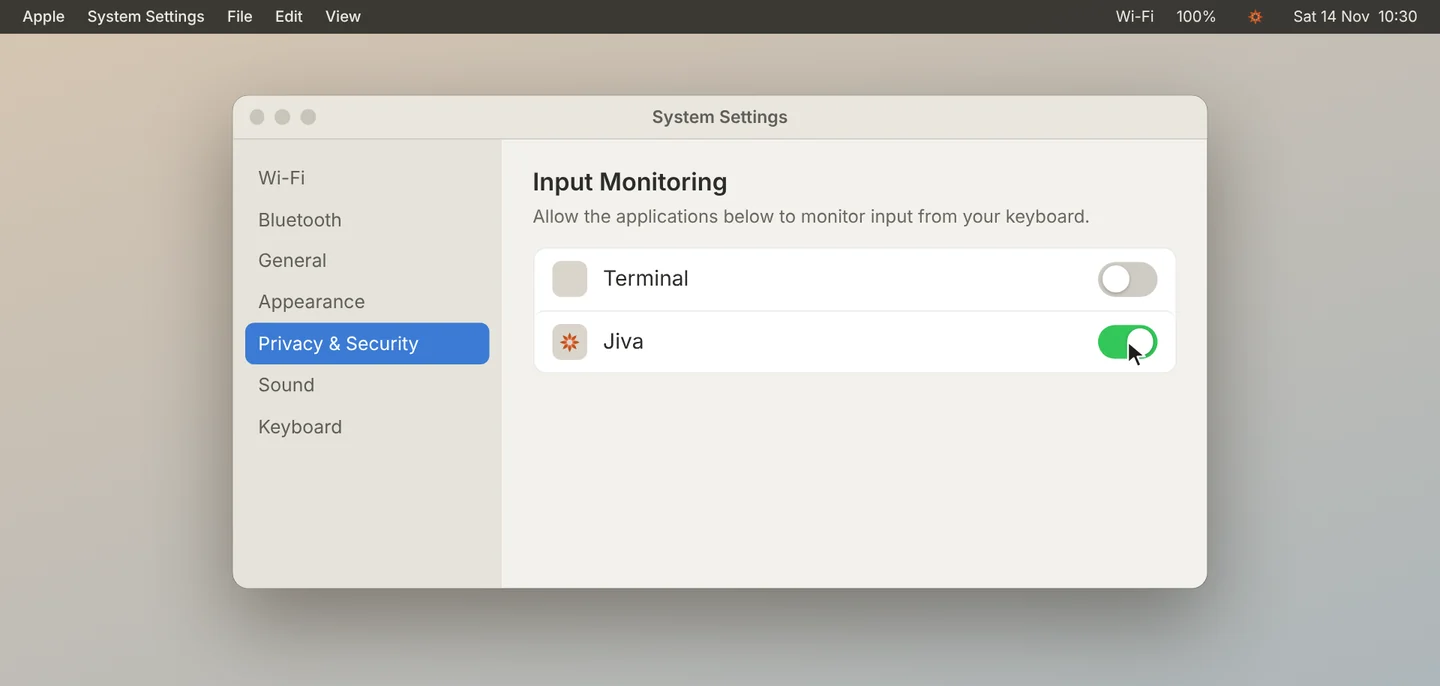
Relaunch Jiva if it asks
macOS sometimes needs Jiva to restart after the last two permissions. If you see Relaunch Jiva, click it. All four rows turn green.
Jiva asks for one more permission, Screen Recording, only if you later turn on “Learn names from the meeting window” in Settings. You do not need it to get started.
If something goes wrong
A row still says it needs access
Click Re-check in the Welcome window. If the row does not change, quit Jiva and open it again.
I closed the Welcome window
Click the lotus in the menu bar and choose Set Up Permissions….
The test says “No system audio detected”
Make sure a sound is playing while the test runs. If it was, open System Settings, turn on System Audio Recording for Jiva, then quit and reopen Jiva and test again.
Dictation does nothing
Check that Accessibility and Input Monitoring are both on, then quit and reopen Jiva.